1) More screen space. Make your icons small. Go to View – Toolbars – Customize and check the “Use small icons” box.

2) Smart keywords.

Method 1: navigate to the site you want to create a quick search for, right-click inside its search box and choose “Add a Keyword for this Search“:

… You are done! Now just type [g seo] in the address bar and you will be instantly brought to Google search results for [seo].
Method 2: (described by SugarRae) useful if the site you want to add doesn’t have any decent search system of its own.
- Search Google [site:yourfavoritesite.com keyword];
- Copy the URL of the search;
- Change keyword in the query string for %s;
- Go: Bookmarks > Organize Bookmarks => New Bookmark;
- Create new search bookmark the following way:


- Spacebar (page down)
- Shift-Spacebar (page up)
- Ctrl+F (find)
- Alt-N (find next)
- Ctrl+D (bookmark page)
- Ctrl+T (new tab)
- Ctrl+K (go to search box)
- Ctrl+L (go to address bar)
- Ctrl+= (increase text size)
- Ctrl+- (decrease text size)
- Ctrl-W (close tab)
- F5 (reload)
- Alt-Home (go to home page)
These shortcuts are available from all Mozilla windows:
| Command | Windows | Mac | Linux |
|---|---|---|---|
| Command | Windows | Mac | Linux |
| Copy | Ctrl+C | Cmd+C | Ctrl+C |
| Paste | Ctrl+V | Cmd+V | Ctrl+V |
| Cut | Ctrl+X | Cmd+X | Ctrl+X |
| Close Window | Ctrl+W | Cmd+W | Ctrl+W |
| Delete Next Word | Ctrl+Del | Ctrl+Del | |
| Go Up One Page | Page Up | Page Up | Page Up |
| Go Down One Page | Page Down | Page Down | Page Down |
| Go Up One Line | Up Arrow | Up Arrow | Up Arrow |
| Go Down One Line | Down Arrow | Down Arrow | Down Arrow |
| Undo | Ctrl+Z | Cmd+Z | Ctrl+Z |
| Redo | Ctrl+Shift+Z | Cmd+Shift+Z | Ctrl+Shift+Z |
| Find | Ctrl+F | Cmd+F | Ctrl+F |
| Find Again | Ctrl+G or F3 | Cmd+G | Ctrl+G |
| Find Links As You Type | ' (apostrophe) | ' (apostrophe) | ' (apostrophe) |
| Find Text As You Type | / | / | / |
| Open search engine page | Ctrl+Shift+F | Cmd+Shift+F | Ctrl+Shift+F |
| Open Context Menu | Shift+F10 | Ctrl+Space | Shift+F10 |
| Open Main Menu (switches to the first drop-down menu at the top of the window. example: "File" in Windows) | Alt or F10 | (Mac OS X: Controlled through keyboard preference in Control Panel) | F10 |
| Move to beginning of line (in a text editing field) | Home | Cmd+Left Arrow | Ctrl+A |
| Move to end of line (in a text editing field) | End | Cmd+Right Arrow | Ctrl+E |
| Exit Mozilla | Ctrl+Q | Cmd+Q | Ctrl+Q |
| Start Navigator | Ctrl+1 | Cmd+1 | Ctrl+1 |
| Start Mail & Newsgroups | Ctrl+2 | Cmd+2 | Ctrl+2 |
| Start Composer | Ctrl+4 | Cmd+4 | Ctrl+4 |
| Start Address Book | Ctrl+5 | Cmd+5 | Ctrl+5 |
| Start IRC Chat | Ctrl+6 | Cmd+6 | Ctrl+6 |
4)
General Mozilla Shortcuts
Auto-complete.
This is another keyboard shortcut, but it’s not commonly known and very
useful. Go to the address bar (Control-L) and type the name of the site
without the “www” or the “.com”. Let’s say “google”. Then press
Control-Enter, and it will automatically fill in the “www” and the
“.com” and take you there – like magic! For .net addresses, press
Shift-Enter, and for .org addresses, press Control-Shift-Enter.
5) Tab navigation. Instead of using the mouse to select different tabs that you have open, use the keyboard. Here are the shortcuts:- Ctrl+Tab (rotate forward among tabs)
- Ctrl+Shft+Tab (rotate to the previous tab)
- Ctrl+1-9 (choose a number to jump to a specific tab)
Fancy Numbered Tabs - Fancy Numbered Tabs will remove the "x" from each tab for closing and replace it with a number. With these numbers in place you can use ctrl + a number or alt + a number to change to the tab of your choice. If you exceed the amount of numbers issued, no matter how many you have, ctrl + 9 will take you to the last tab.
LastTab - Ctrl-Tab navigation is altered with this add-on that allows you to get to the most recently opened tabs first, and also adds a drop down menu for mouse navigation through your tabs. Great for those who need to change tabs rapidly on a regular basis.
NumExt - Numbered Tabs - Numbered Tabs is an easy way to navigate through numerous tabs you may have open. Num-Ext will number your tabs and you can then use ctrl + 1 - 9 to navigate through the first nine tabs, and alt + 1 - 9 for 10 through 17.
TabNavIt - TabNavIt allows you to hold down your right mouse button and then use the scroll wheel on your mouse to navigate through the various tabs you have open. Unlike other scrolling add-ons, this one can be used from anywhere in the browser window since it requires the right-click to work.
Tab Wheel Scroll - This add-on has one simple duty, and that is to place your mouse in the tab bar and then use your scroll wheel to move back and forth amongst the tabs to select the one you want to switch to. Wonderful extension for those that have numerous tabs open at any given time.
Tab Visualization

FishEyeTabs - This particular tool will magnify a tab for easier reading when you have too many tabs open and the labels have gotten too small for you to read.
FoxTab - FoxTab provides you with five graphical interfaces for displaying your tabs so that you can browse through them without just having to stare at the names along the top and hope you remember what the site is about. This extension could be especially useful to web designers as you can easily have multiple screenshots displayed at once depending on the configuration you choose.
Tab Catalog - Using different commands such as F8 or clicking both mouse buttons at once, you can launch a thumbnail gallery of all your current tabs with Tab Catalog. Once the thumbnails are open, you can close any of them or multiple tabs at once.
Tab Popup - Tab Popup allows you to simply roll your mouse over a tab to see a preview of what it contains. Since the previews are larger than a standard thumbnail, Tab Popup is great for people who need to have lots of tabs open for research.
Tab Preview - This popup preview lets you set options such as how long after mouseover it should display the preview, the size of the thumbnail and where it should be displayed.
Tab Sidebar - As the name suggests, Tab Sidebar moves your tabs to the sidebar, hiding the original tabs menu. The most noticeable difference with this new placement is that you get a thumbnail preview of each tab in the sidebar for easier browsing. Other features include updating thumbnails, navigation for each tab, drag-and-drop movement of the tabs and more.
Tab Slideshow - Tab Slideshow will begin scrolling through all of your open tabs after an amount of time that you set. While this might not be the most useful add-on, it could be a fun screensaver while you're on a phone call.
Miscellaneous Tools

Morning Coffee - While there are other extensions that let you save tabs to open each time you start Firefox, Morning Coffee allows you to setup which tabs open automatically according to which day of the week it is. The example they give is the web comic Penny Arcade that updates Monday, Wednesday and Friday, so there's no need to open that site on Tuesday and Thursday, and that's no problem for this handy application. This is absolutely perfect for the Internet addicted amongst us, which is pretty much all of us.
Page Title Eraser - With Page Title Eraser, you are able to completely erase the title of the tab from your window so it just appears untitled in your browser. You can also use it to rename a title if you choose to do so, making it impossible for anyone to look over your shoulder and get an idea of what you're looking at.
Send Tab URLs - This extension will allow you to copy the URLs of all your currently open tabs to the clipboard or directly to an email program. If you plan to send the list to email, it can only be 30 addresses long, but the clipboard allows for unlimited addresses. This is the perfect tool for people who need to cite the resources they use for projects.
Tab History - Whenever you open a new tab, it opens up with no history, but with Tab History all of your new tabs retain the browsing history of their "parent" tab. This is especially handy if you are splintering off tabs from the same site over and over to explore different parts of the site.
Tab URL Copier - This add-on provides you with a new choice in your right-click context menu that allows you to copy the URLs of all your open tabs to the clipboard so that you can email them or simply keep track of them for any research you may be doing.
TabRenamizer- Ever had sites open in a tab that you would rather not have your boss or family know you are looking at? Even if you have another tab in the foreground, the name of the site still appears on the other tab, but with TabRenamizer you rename a tab to anything of your choosing. Great tool for anyone that needs to conceal a site they may not want others to know they are browsing.
6) Mouse shortcuts. Sometimes you’re already using your mouse and it’s easier to use a mouse shortcut than to go back to the keyboard. Master these cool ones:
- Middle click on link (opens in new tab)
- Shift-scroll down (previous page)
- Shift-scroll up (next page)
- Ctrl-scroll up (decrease text size)
- Ctrl-scroll down (increase text size)
- Middle click on a tab (closes tab)
| Command | Shortcut |
|---|---|
| Back | Shift+Scroll Down |
| Forward | Shift+Scroll up |
| Zoom In | Ctrl+Scroll up |
| Zoom Out | Ctrl+Scroll down |
| Close Tab | Middle-click on Tab |
| Open link in new Tab | Middle-click on Link |
| New Tab | Double-Click on Tab Bar |
| Open in Background Tab* | Ctrl+Left-click link Middle-click link |
| Open in Foreground Tab* | Ctrl+Shift+Left-click Shift+Middle-click |
| Open in New Window | Shift+Left-click link |
| Copy Tab or Bookmark | Ctrl+Drag tab |
| Reload (override cache) | Shift+Reload button |
| Save Page As | Alt+Left-click |
| Scroll line by line | Alt+Scroll |
7) Delete items from address bar history.
Firefox’s ability to automatically show previous URLs you’ve visited,
as you type, in the address bar’s drop-down history menu is very cool.
But sometimes you just don’t want those URLs to show up (I won’t ask
why). Go to the address bar (Ctrl-L), start typing an address, and the
drop-down menu will appear with the URLs of pages you’ve visited with
those letters in them. Use the down-arrow to go down to an address you
want to delete, and press the Delete key to make it disappear.
Pull down the address bar typed URLs history list, use cursor or mouse
to point the URL or link that you want to delete, and then press
SHIFT-DELETE keys (pressing SHIFT and DELETE keys simulatenously). The
URL or link will be removed from the address bar history.
8) User chrome.
If you really want to trick out your Firefox, you’ll want to create a
UserChrome.css file and customize your browser. It’s a bit complicated
to get into here, but check out this tutorial.
You can use these hacks to change the appearance of
Firefox by hiding menus, hiding the separator bars, removing menus or
even move the tabbar to the bottom.
This file does not exist by default, so you will have to create it yourself the first time. If you can’t find the location in the chart I give you, make sure you are able to view your hidden folders/files, since I know XP for sure hides them.
To create the userChrome.css file in windows: Open a text editor (notepad or wordpad) and save the file as “userChrome.css” into a directory listed below according to the OS your using. To edit userChrome.css after it’s created just right click on the file and select ‘Edit’, then edit the file using wordpad or notepad.
Locations to create the userChrome.css file:
- 95/98/ME — c:\windows\Application Data\Phoenix\Profiles\[profile-name]\[#s].slt\chrome\
- NT — %UserProfile%\Application Data\Phoenix\Profiles\[profile-name]\[#s].slt\chrome\
- 2000/XP — C:\Documents and Settings\[USER]\Application Data\Mozilla\Firefox\Profiles\default.tea\chrome\
- *NIX — ~/.phoenix/[profile-name]/[#s].slt/chrome/
/* Remove separators between toolbars*/
#toolbar-menubar {
 min-height: 12px !important;
 padding: 0px !important;
 margin: 0px !important;
 border: none !important;
}
#nav-bar {
 border: none !important;
 padding: 0px !important;
}
#PersonalToolbar {
 border: none !important;
}
#navigator-toolbox {
  border-bottom-width: 0px !important;
}
/* Remove Bookmark Toolbar folder from the bookmarks menu */
menu[label=”Bookmarks Toolbar Folder”] { display: none !important; }
/* Add a keyword when adding a bookmark */
#keywordRow { display: -moz-grid-line !important; }
/* Move sidebar to bottom */
#browser {-moz-box-orient: vertical; -moz-box-direction: reverse}
#sidebar-box {-moz-box-orient: horizontal; -moz-box-direction: reverse}
#appcontent {-moz-box-orient: horizontal}
#sidebar {max-width: inherit !important; min-height: inherit !important}
#sidebar-box > sidebarheader {
 -moz-box-orient: vertical;
 -moz-box-direction: reverse;
 -moz-box-pack: end;
 border-left: 1px solid ThreeDHighlight;
 margin-left: 1px;
}
#sidebar-box .tabs-closebutton > .toolbarbutton-icon {
padding: 4px 2px !important
}
#sidebar-title {display: none}
#sidebar-throbber {margin-left: 4px}
/* Remove the close button on the tab bar and sidebar */
.tabs-closebutton { display: none !important; }
/* Hide Tabbar close Button */
tabbrowser .tabs-closebutton-box {
  display: none; }
/* Remove Stop button when there’s nothing to Stop */
#stop-button[disabled=”true”] { display: none; }
/* Remove Back button when there’s nothing to go Back to */
#back-button[disabled=”true”] { display: none; }
/* Remove Forward button when there’s nothing to go Forward to */
#forward-button[disabled=”true”] { display: none; }
/* Multi-row bookmarks toolbar */
#bookmarks-ptf {display:block}
#bookmarks-ptf toolbarseparator { display:inline }
/* Make the active tab not bold */
tab[selected=”true”] { font-weight: normal !important; }
/* Show tab favicon only on selected tab */
tab:not([selected=”true”]) .tab-icon {
  display: none !important; }
/* Make inactive tabs hardly visible */
#content tab:not([selected=”true”]) {
    -moz-opacity: 0.5 !important; }
/* Remove extra padding from the Navigation Bar */
.toolbarbutton-1, .toolbarbutton-menubutton-button {
  padding: 2px 3px !important;
}
.toolbarbutton-1[checked=”true”], .toolbarbutton-1[open=”true”],
.toolbarbutton-menubutton-button[checked=”true”],
.toolbarbutton-menubutton-button[open=”true”] {
  padding: 4px 1px 1px 4px !important; }
/* Remove focus rings (dotted rectangle) around active tabs */
tab:focus > .tab-middle { -moz-outline: none !important }
/* Remove white line under unfocused tab */
tab{
   -moz-appearance: none !important;
border-bottom: none !important; }
/* Hide the Go menu */
menu[label=”Go”] {
   display: none !important; }
/* Hide read mail from Tools Menus */
menuitem[label=”Read Mail (0 new)”] { display: none; }
menuitem[label=”Read Mail (0 new)”] + menuseparator { display: none; }
menuitem[label=”New Message…”] { display: none; }
menuitem[label=”New Message…”] + menuseparator { display: none; }
/* Remove Web Search from Tools Menu */
menuitem[label=”Web Search”] { display: none; }
menuitem[label=”Web Search”] + menuseparator { display: none; }
/* Hide For Internet Explorer Users & Release Notes from Help Menu */
menuitem[label=”For Internet Explorer Users”] { display: none; }
menuitem[label=”Release Notes”] { display: none; }
/* Slightly rounded address and search bar corners */
#urlbar {
-moz-appearance: none !important;
-moz-border-radius: 3px !important;
  padding-right: 1px !important; }
/* Remove the ‘Go’ button */
#go-button {
  display: none !important; }
/* Remove the forward and back button dropdown arrows */
#back-button .toolbarbutton-menubutton-dropmarker,
#forward-button .toolbarbutton-menubutton-dropmarker {
  display: none !important; }
/* Rollover Searchbar */
#search-container {
  margin: 0 1px 0 0 !important;
  padding: 0 0 0 5px!important;
}
#search-container .searchbar-textbox,
#search-container .textbox-input-box {
  margin: 0 !important;
  padding: 0 !important;
}
#search-container .searchbar-dropmarker {
  margin: 1px 0 0 1px !important;
  padding: 0 !important;
}
#search-container * {
  width: auto !important;
}
#search-container .textbox-input-box {
  width: 0 !important;
}
#search-container:hover .textbox-input-box {
  /* width: auto !important; */
  width: 200px !important;
  padding: 0 0 0 5px !important;
}
#search-container .searchbar-textbox {
  -moz-appearance: none !important;
  border: 0 !important;
  background-color: -moz-dialog !important;
}
#search-container:hover .searchbar-textbox {
-moz-appearance: textfield !important;
-moz-border-radius: 5px !important;
background-color: -moz-field !important; }
/* Find Toolbar Changes enhancements*/
#FindToolbar {
  border: 0 !important;
  border-top: 0px solid !important;
}
window:not([windowtype=”navigator:view-source”]) #FindToolbar {
  border-bottom: 0px solid !important;
}
#FindToolbar #find-closebutton:hover {
  border-color: transparent !important;
  background-image: none !important;
}
#FindToolbar label[value=”Find:”] {
  margin: 0 !important;
  padding: 2px 2px 3px 5px !important;
  border-left: 2px solid !important;
  -moz-border-left-colors: ThreeDShadow ThreeDHighlight !important;
}
#FindToolbar #find-field-container {
  margin: 0 2px !important;
  padding: 0 !important;
}
#FindToolbar #find-field {
  margin: 0 !important;
  padding: 0 0 0 2px !important;
  width: 200px !important;
}
#FindToolbar #find-field[status=”notfound”] {
  color: rgb(0, 0, 0) !important;
  background-color: rgb(255, 240, 224) !important;
}
#FindToolbar checkbox {
  margin: 0 2px !important;
  padding: 2px 0 1px 4px !important;
  border: 0 !important;
  border-left: 2px solid !important;
  -moz-border-left-colors: ThreeDShadow ThreeDHighlight !important;
}
#FindToolbar checkbox .checkbox-label-box {
  margin: 0 !important;
  padding: 0 0 0 3px !important;
}
#FindToolbar #find-status-icon[status] {
  margin: 0 0 0 2px !important;
  padding: 1px 0 1px 4px !important;
  width: 22px !important;
  height: 18px !important;
  border: 0 !important;
  border-left: 2px solid !important;
  -moz-border-left-colors: ThreeDShadow ThreeDHighlight !important;
}
#FindToolbar #find-status {
  font-weight: bold !important; }
9) Create a user.js file. Another way to customize Firefox, creating a user.js file can really speed up your browsing. You’ll need to create a text file named user.js in your profile folder (see this to find out where the profile folder is) and see this example user.js file that you can modify. Created by techlifeweb.com, this example explains some of the things you can do in its comments.
In Mozilla-based web-browsers, you can create and use a \"user.js\" file to customize preferences. Creating and editing a user.js file is only recommened for advanced users as it requires manual coding. It is recommended you use the \"about:config\" (type \"about:config\" into the address bar, press Enter) unless you know that you need a user.js file. User.js files override any preferences or configurations you set while the browser is open.
Instructions
-
-
1
Backup your \"prefs.js\" file first. Creating a \"user.js\" file copies entries to \"prefs.js\" so a backup is important. Click the Windows logo on the taskbar, type \"%APPDATA%\\Mozilla\" and then double-click the \"profile\" folder. Locate \"prefs.js\" file, right-click it, choose \"Copy,\" switch to the desktop, or another folder you want to keep for backups. Right-click, then choose \"Paste\" in your backup folder.
-
2
Create a user.js file using ChromEdit. Go to the ChromEdit Plus website (see \"Resources\") and scroll down to \"Works in…\" to see if it is compatible with your browser. If it is, click \"Install\" beneath the latest version information to install the extension. Restart your browser once installed, click \"Tools\" then \"ChromEdit Plus\" and then \"ChromEdit Plus.\" Click \"user.js\" to begin editing your user.js file, click \"Save\" and then \"Restart\" for effects to take place.
-
3
Create a user.js file manually if you cannot install ChromEdit. Close your browser, then open a plain text editor such as Notepad and code your user.js file. Once you have finished your user.js editing, click \"File\" then \"Save As\" and save to \"%APPDATA%\\Mozilla\\Profile\" using \"user.js\" as your file name.
-
1
You may have installed countless add-on in Firefox to enhance your using experience, but if you want to get the most out of Firefox, you really have to hack your way into the about:config.
The about:config page contains most (if not, all) of Firefox configuration options. It is so far the most effective, and the most powerful way to tweak and enhance your Firefox performance. Here are 28 of the popular tweaks.
Accessing your about:config page
In your Firefox, type about:config in the address bar.
You will be shown a warning page. Click the “I’ll be careful, I promise!” button to proceed.
On the main page, you will see a long list of configuration entries. Enter the name of the key you want to update in the “Filter” field. The list will narrow to only the entries that match your keyword as you type.
To modify the value, simply double click on the entry value field and update the entry. That’s all!
Isn’t that simple? Now, let’s get to the tweaking.
1) Adjust the Smart Location Bar’s Number of Suggestions
In Firefox 3, when you start typing in the location bar, a drop-down list of suggestion URLs will be shown. If you want it to show more than 12 suggestions (12 is the default), you can adjust the browser.urlbar.maxRichResults keys and get it to show the number you want.
Config name: browser.urlbar.maxRichResults
Default: 12
Modified value: Set to your desired number of suggestion. If you want to disable it all together, set it to -1
2) Disable the session restore function
Firefox 3 automatically saves your session every 10 secs so that whenever it crashes, it can restore all your tabs. While this is a useful feature, some of you might find it irritating. To disable this function, toggle the value of browser.sessionstore.enabled to False
Config name: browser.sessionstore.enabled
Default: True
Modified value: False if you want to disable the session restore function
3) Adjust the Session Restore Saving Frequency
Same as above, if you decided to keep the session restore feature on, but want to reduce the session saving frequency, change the value of browser.sessionstore.interval so that Firefox will save the session at a longer interval.
Config name: browser.sessionstore.interval
Default: 10000 (in msecs, equivalent to 10secs)
Modified value: Set it to your desired value. 1000 means 1 sec and 60000 means 1 minute.
4) Enable Advanced Color Profile Support
Firefox has this advanced color profile features that display higher image quality. It is not enabled by default as it has a negative effect on the performance of the browser. If you are concern with the image quality rather than the performance, you can activated it via the gfx.color_management.enabled setting
Config name: gfx.color_management.enabled
Default: False
Modified value: True (if you want to activate the color profile support feature)
5) Disable Antivirus Scanning
This is mainly for Windows users. By default, Firefox 3 automatically scan the downloaded file with the default anti-virus application to make sure it is free of virus. If you download a big file, it could take a long time for the whole scanning process to complete. To increase the performance of the browser, you might want to consider disabling the anti-virus scanning via the browser.download.manager.scanWhenDone key.
Config name: browser.download.manager.scanWhenDone
Default: True
Modified value: False (if you want to disable it)
6) Configuring The Scrolling Tabs
When you opened many tabs, Firefox will not keep on reducing the tab width. Instead, it shows a scrolling bar so that the min width (100px) is conserved and you can scroll to find your tabs. If you are those who don’t like the scrolling tab function and prefer Firefox to show all the tabs, regardless how small it is, you can set the value of browser.tabs.tabMinWidth to 0 to disable it. Similarly, if you want Firefox to display more tabs before showing the scrolling button, you can reduce the default value to a lower value, say 75 pixels.
Config name: browser.tabs.tabMinWidth
Default: 100
Modified value: 0 if you want to disable the scrolling functions, other values to set the min width value
7) Show/Disable Close button on Tabs
Some people love to see the Close (the red X) button on every tabs, but some hate it. Whatever is it, you can configure it to your preferences via the browser.tabs.closeButtons setting.
Config name: browser.tabs.closeButtons
Default: 1
Modified values:
- 0 – display a close button on the active tab only
- 1- display close buttons on all tabs
- 2- don’t display any close buttons
- 3- display a single close button at the end of the tab strip
In Firefox 3, a script is only given 10 seconds to respond, after which it will issue a unresponsive script warning. If you are hooked on a slow network connection, you might want to increase the script execution time via dom.max_script_run_time to cut down on the frequency of the no script warning.
Config name: dom.max_script_run_time
Default:10 (in secs)
Modified value: 20, or any values greater than 10
9) Handling JavaScript Popups
When you come across a site that executes a javascript open new window function, and if the popup window is without all the usual window features, i.e. back/forward/reload buttons, status bar etc, Firefox will automatically treat it as a popup and will not open it as a new tab. However, if you find this to be a nuisance and wanted to open all new windows in a new tabs, you can specify it via the browser.link.open_newwindow.restriction setting.
Config name: browser.link.open_newwindow.restriction
Default: 2 – Open all JavaScript windows the same way as you have Firefox handle new windows unless the JavaScript call specifies how to display the window
Modified values:
- 0 – open all links as how you have Firefox handle new windows
- 1 – do not open any new windows
- 2- open all links as how you have Firefox handle new windows unless the Javascript specify how to display the window
The default spell checking function only checks for multi-line text boxes. You can get it to spell-check for single line text box as well.
Config name: layout.spellcheckDefault
Default: 1 (spell checker for multi-lines text boxes only)
Modified values:
- 0 – disable the spell checker
- 2 – enable the spell checker for all text boxes
When you search using the search box at the top right hand corner of the browser, it will display the search results in the current tab. If you don’t want the search to interfere with your current tab, you can tweak the browser.search.openintab to make it open in a new tab.
Config Name: browser.search.openintab
Default: False
Modified value: True (open search box results in new tab)
12) Lower The Physical Memory Used When Minimized
This tweak is mainly for Windows users. When you minimize Firefox, it will send Firefox to your virtual memory and free up your physical memory for other programs to use. Firefox will reduce its physical memory usage, when minimized, to approximately 10MB (give or take some) and when you maximize Firefox it will take back the memory that it needs.
The preference name does not exist and needs to be created.
Right click on the background and select New->Boolean.
Enter the name when prompted: config.trim_on_minimize
Enter the values: True
13) Speed up your Firefox
Several tweaks required for this
Config name: network.http.pipelining
Default: False
Modified value: True
Config name: network.http.proxy.pipelining
Default: False
Modified value: True
Config name: network.http.pipelining.maxrequests
Default: 4
Modified value: any value higher than 4, but not more than 8
Config name: network.http.max-connections
Default: 30
Modified value: 96
Config name: network.http.max-connections-per-server
Default: 15
Modified value: 32
14) Increase/Decrease the Amount of Disk Cache
When a page is loaded, Firefox will cache it into the hard disk so that it doesn’t need to be download again for redisplaying. The bigger the storage size you cater for Firefox, the more pages it can cache.
Before you increase the disk cache size, make sure that browser.cache.disk.enabled browser.cache.disk.enable is set to True.
Config name: browser.cache.disk.capacity
Default: 50000 (in KB)
Modified value:
- 0 – disable disk caching
- any value lower than 50000 reduces the disk cache
- any value higher than 50000 increases the disk cache.
In Windows and Mac, Firefox highlights all text when you click on the URL bar. In Linux, it does not select all the text. Instead, it places the cursor at the insertion point. Regardless which platform you are using, you can now tweak it to either select all or place cursor at insertion point.
Config name: browser.urlbar.clickSelectsAll
Modified value:
- False – place cursor at insertion point
- True – select all text on click
Other than the smart location feature, you can also get your URL bar to autofill the address as you type the URL.
Config name: browser.urlbar.autofill
Default: False
Modified value: True (Have Firefox autofill the address as you type in the URL bar)
17) Same Zoom Level For Every Site
Firefox remembers your zoom preference for each site and set it to your preferences whenever you load the page. If you want the zoom level to be consistent from site to site, you can toggle the value of browser.zoom.siteSpecific from True to False.
Config name: browser.zoom.siteSpecific
Default: True
Modified value: False (enable same zoom preferences for every sites)
18) Setting your zoom limit
If you find that the max/min zoom level is still not sufficient for your viewing, you can change the zoom limit to suit your viewing habits.
Config name: zoom.maxPercent
Default: 300 (percent)
Modified value: any value higher than 300
Config name: zoom.minPercent
Default: 30 (percent)
value: any value
19) Configure Your Backspace Button
In Firefox, you can set your backspace to better use by getting it to either go back to the previous page or act as page up function.
Config name: browser.backspace_action
Default: 2 (does nothing)
Modified value:
- 0 – go back previous page
- 1- page up
If you do not have access to Internet most of the time, you might want to increase the offline cache so that you can continue to work offline. By default, Firefox 3 caches 500MB of data from supported offline Web apps. You can change that value to whatever amount of your choice.
Config name: browser.cache.offline.capacity
Default: 512000 (in KB)
Modified value: any value higher than 512000 will increase the cache value
21) Auto Export Firefox 3 bookmarks to bookmarks.html
Unlike the previous version, Firefox 3 backup the bookmarks file in places.sqlite rather than the usual bookmarks.html. Since bookmarks.html allows us to export and sync our bookmarks with other browser, it will be very useful if Firefox 3 can backup the bookmark to the bookmarks.html as well.
Config name: browser.bookmarks.autoExportHTML
Default: False
Modified value: True (auto export bookmarks file to bookmarks.html)
22) Disable Extension Compatibility Checks
This is useful if you want to use an extension that is not supported by your version of Firefox badly. It is not recommended, but you can still do it at your own risk.
Right click and select New->Boolean. Enter extensions.checkCompatibility in the field. Enter False in the next field.
Right click again and select New->Boolean. Enter extensions.checkUpdateSecurity into the field and enter False into the next field.
23) Disable Delay Time When Installing Add-on
Everytime you wanted to install a Firefox add-on, you will have to wait for several secs before the actual installation starts. If you are tired of waiting, you can turn the function security.dialog_enable_delay off so that the installation will start immediately upon clicking.
Config name: security.dialog_enable_delay
Default: 2000 (in msec)
Modified value:
- 0 – start installation immediately
- any other value (in msec)
This is very useful for developers who are always using the ‘view source‘ function. This tweak allows you to view the source code in an external editor.
There are two configuration need to be made:
Config name: view_source.editor.external
Default: False
Modified value: True ( enable view source using external text editor)
Config name: view_source.editor.path
Default: blank
Modified value: insert the file path to your editor here.
25) Increasing ‘Save Link As‘ timeout value
When you right click and select the ‘Save Link As…‘, the browser will request the content disposition header from the URL so as to determine the filename. If the URL did not deliver the header within 1 sec, Firefox will issue a timeout value. This could happen very frequently in a slow network connection environment. To prevent this issue from happening frequently, you can increase the timeout value so as to reduce the possibility of a timeout.
Config name: Browser.download.saveLinkAsFilenameTimeout
Default: 1000 (1 sec)
Modified value: any value higher than 1000 (value is in msec)
26) Animate Fullscreen Toolbar Collapse mode
In Firefox’s fullscreen mode, toolbars and the tab strip are hidden at the top of the screen and only shown on mouseover. To draw attention to this, there is an animation of the toolbar sliding upwards and off-screen when fullscreen mode is toggled on. For performance issue, the animation of the collapse of the toolbar only appear for the first time. For some reason that you may love/hate the animation, you can adjust Browser.fullscreen.animateUp to switch it on/off for every collapse.
Config name: Browser.fullscreen.animateUp
Default: 1 (animate the toolbar collapse only the first time)
Modified value:
- 0 -disable the animation
- 2- enable the animation for every collapse
In fullscreen mode, the toolbar is set to autohide and appear upon mouseover. If you have a need to view the toolbar at all time, you can toggle the value of browser.fullscreen.autohide to False to always show the toolbar.
Config name: browser.fullscreen.autohide
Default: True (always autohide)
Modified value: False (always show the toolbar)
28) Increase Add-On search result
If you go to Tools->Add-ons->Get Add-ons and perform a search there, Firefox will only fetch and display 5 matching results. If you want Firefox to show more than 5 results (say 10), you can adjust extensions.getAddons.maxResults to get it to display more results.
Config name: extensions.getAddons.maxResults
Default: 5
Modified value: any value more than 5
This list of about:config is definitely not the complete list. If you have any tricks not listed here, please add it in the comment.
11) Add a keyword for a bookmark. Go to your bookmarks much faster by giving them keywords. Right-click the bookmark and then select Properties. Put a short keyword in the keyword field, save it, and now you can type that keyword in the address bar and it will go to that bookmark.
Create keyword shortcuts for your favorite search engines, and for any bookmark.
You can create a keyword shortcut from a simple site Search form (or any single line form) by right clicking within the form and choosing
"Add a Keyword for this Search" (built-in) which will bring up a form similar to this
[picture] The actual location code
(url) generated will include fields that you would not normally be aware of within the search form.
With the "Add Bookmark Here ²" extension, you can include a keyword
when you create a normal bookmark as in the dialog at the right. The
extension has several
features including bookmarking the active tab url from a bookmark
folder's context (right-click) menu. The "OpenBook" extension was an
older less featured extension.
You can create a keyword without an extension using a style "Keyword addition for Add/Change Bookmark (Fx3) | userstyles.org (9029), but the extension is better.
Without any of the methods above you will not see the keyword or description field when you create the bookmark, but you can still enter the additional information through the Bookmark Properties to add/change a keyword.
I have keyword shortcuts set up for such things as a web search, search a few selected sites, dictionary, wiki, stock quotes -- things that can use the substitutions for the %s (with substitution) or %S (substitution without re-substitution), usually placed at the end. Using the small %s will result in additional substitutions of # replaced by %23, % by %25, and / by %2F. No additional substitution will occur with capital %S (see Bug: 270703)
Difference between (small s) %s and (Capital S) %S
(#fragmentid)
- (small s): %s will have additional substitution replacements: # by %23, % by %25, and / by %2F, @ by %40.
- (Capital S): %S will not have substitutions and allow use of C++ in a Google search, allow use of @ in an email substitution, allow use of a fragment-id in a url substitution index.html#example2, and use of a directory as in code/example2.txt.
How are keyword shortcuts created: The easiest way is to create a bookmark with the bookmark star (Firefox version 3), or the previous methods with "Ctrl+D", or drag the favicon symbol to the left of the location bar to a bookmarks folder in the "Bookmarks Toolbar" (personal bookmarks), the "Bookmarks Menu" or to "Unsorted bookmarks".
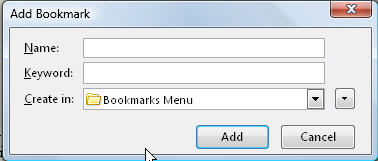
Assigning a keyword shortcut to a bookmark: Bring up the Bookmark Manager ("Ctrl+Shift+B") or the Bookmarks Sidebar ("Ctrl+B"), Right click on the bookmarklet to bring up properties and assign a shortcut to it. Suggest including a colon as shown on mine to reduce errors. See Bookmark Properties picture
Colon within or at end of a keyword is a very good solution that distinguishes from location bar searching and from use of tags. Opera users may have a problem as colon is not allowed in a nickname. The beauty of Firefox keywords is that there are no restrictions on use of any character and is based on how used. Tags was an unwelcome Fx3 feature because it hid usage of pre-existing usage of keyword shortcuts, and has made bookmarking dialogs very unwieldy and confusing to new users and previous Firefox users alike. While shared tags in sites like delicious.com have proven useful because of the wide range of users it has been a thorn for Firefox users, and made bookmarks with tags less efficient even though it is in a database.
Besides the shortcut is anything else special: Use of %s (percent-sign lowercase s) will be substituted when invoked by whatever you specify whether it be a filename, words for a search, whatever you include will be included in the invoked url.
Difference between %s and capitalized %S for substitutions.
Originally %s (lowercase) was the only substitution available in keyword shortcuts, but since substitutions occurred it made inclusions of commercial pound sign (#) as used in fragment=id, slash (/) as used in including a directory, and at sign (@) as used in email impractical as they were substituted respectively by %23 for #, %47 for /, and %40 for @. [references: bug 270703 (2004-11-18),
The %s (lowercase s) was what was intended by developers, but I'm hard pressed to find many examples where an htmlified version should be used, unless Javascript is involved.
The %S (uppercase S) without additional substitutions appears to be what I need most, if not, all of the time.
Usage: I would be hard pressed to find anything where that (lowercase s) should even ever be used as much of my usage may involve substitutions like
ffp: . (directory or default index)
ffp: kws.htm
ffp: firefox.htm
ffp: firefox.htm#ext (use of fragment id)
ffp: code/ (to show the code directory)
g: link:dmcritchie.mvps.org/firefox/kws.htm
gg: dmcritchie.mvps.org/firefox/kws.htm
Null Argument If we assign google: to http://www.google.com/%s (lowercase s), some examples
google: followed by no spaces generates http://www.google.com/%s
google: followed by one space generates http://www.google.com/%s same as before since there is still no operand
google: followed by two spaces generates http://www.google.com/ since the operand is considered empty
google: followed by a period generates http://www.google.com/ which is the directory appears same a null
google: followed by "maps" generates http://www.google.com/maps
images, video, news, maps, gmail, etc.; some will be like http://images.google.com
Quick Demonstration (#quickdemo)
google: followed by no spaces generates http://www.google.com/%s
google: followed by one space generates http://www.google.com/%s same as before since there is still no operand
google: followed by two spaces generates http://www.google.com/ since the operand is considered empty
google: followed by a period generates http://www.google.com/ which is the directory appears same a null
google: followed by "maps" generates http://www.google.com/maps
images, video, news, maps, gmail, etc.; some will be like http://images.google.com
Using the keyword shortcut "w:") bookmarked to http://en.wikipedia.org/wiki/%s for a quick demonstation of how keyword shortcuts work: (It takes two spaces to enter with a null argument)
- w: what is Wikipedia (notice there is a redirection comment)
- w: who is John
- w: goo
- w: (followed by single space, same as no space meaning no arguments, you will see %s, or %25, in url and in document)
- w: (followed by two spaces, the second replaces the %s)
Character Arguments (#chr): It is possible to search on
"C++" which Google would normally just treat as the letter "C". Here is a shortcut (source: Hao2lian),
I created this with a shortcut of ("g:chr").
javascript:document.location = "http://www.google.com/search?q=" + encodeURIComponent('%s');
Example:
g:chr pl/i c++ "John W Kennedy" Folder for shortcuts: Suggest putting your keyword shortcuts in their own folder. Anything after the keyword in the location bar will replace %s in the shortcut bookmark. My folder is named K within my Bookmarks Toolbar. The folder doesn't have to be readily accessible for use but you want to have fairly quick access to add items to it, and to help you “remember” the shortcuts you created. I choose to put a colon at the end of the word. The following may be customized for my own use but give you an idea of what you can use.
Example: Enter http://dictionary.reference.com/search?q=%s on the location bar, bookmark the resulting url by dragging the favicon picture on the left of the url within the location bar to within your toolbars or preferably to within the K folder on your personal bookmarks bar (if you created one), right click on properties to give it a keyword of "dict:" (with the colon) and a title of "dict: Dictionary Search". Then you can type "dict: spelling" on the location bar and get a definition for "spelling".
New Tab:
You should have Tools, Options, Tabs set so that new windows opens in a New Tab
Use Alt+Enter keyboard shortcut to open url on location bar in a new tab, also works for keyword shortcuts
In a Google search link add &newwindow=1
In a JavaScript link include new-window as the link for NT: User keyword shortcuts:
chrome:     userChrome, userContent, launchy

    [-- file:///C:/Documents%20and%20Settings/Administrator/Application%20Data/Mozilla/Firefox/Profiles/default.NOP/chrome --]

    use about:cache to help you set up this shortcut keyword (keyword use has a space after colon)

config:     about:config  [-- about:config --]
documentation can be found at About:config entries - MozillaZine Knowledge Base

g:          Google  [-- http://www.google.com/search?q=%s --]

gg:         Google Groups Advanced Search (*excel*)

            [-- http://groups.google.com/groups?as_ugroup=*excel*&num=100&as_q=%s --]

ggff:         Google Groups Advanced Search (*firefox*)

            [-- http://groups.google.com/groups?as_ugroup=mozilla.support.firefox&num=100&as_q=%s --]

gga:        Google Groups Advanced Search Panel (*excel*)

            [-- http://groups.google.com/advanced_group_search?q=group:*Excel*&num=100 --]

l:          Librarians' Index to the Internet  [-- http://lii.org/pub/htdocs/search?sm=;search=%S;action=show --]

profile:    profile directory  (like chrome: must be customized to user's own profile)


[file:///C:/Documents%20and%20Settings/Administrator/Application%20Data/Mozilla/Firefox/Profiles/default.NOP/]

w:          Wikipedia  [-- http://en.wikipedia.org/wiki/%s --]

xl:         Excel on local HD  [-- file:///c:/localsite/dmcritchie/excel/%s --]

z:          search dmoz.org Open Directory of webpages  [-- http://www.google.com/search?q=site%3Admoz.org+%s --]
There are some special considerations for Google Advanced Search regarding the keyword shortcuts of gg: and gga: seen above that are covered on an additional page (google.htm) in more detail, and also Remediation for disatrous Google Beta Groups.
about: « builtin keywords for about:, about:config, about:cache, about:buildconfig, about:plugins, about:credits, about:blank More informaton on about:config preference entries documentation in the MozillaZine Knowledge Base. This documentation has progressively degenerated since some decision was made to move things into categories, for instance accessibility is no longer in the document (moved 2006-01-03 06:10:10.
bookmarklets which have been also implemented as keyword shortcuts — highlight:(highlight links), href:, id:, int:(int/ext links), titles:(paren tips), reset:(PF5)
bugzilla
Appears to be fixed in Firefox 1.5 -- xlp: join.htm#trimall works as does
archive: http://dmcritchie.mvps.org/excel/join.htm#trimall
Use of fragment-id on a page
can mess up bringing up same page in an editor such as with the
"Launchy" extension, simply remove the fragment-id, refresh, and
try again as this is not a Firefox problem and a fragment-id would be
completely meaningless to an application such as an editor.
Directory in a shortcut: if you have a shortcut such as
xx: pointing to http://example.com/directory1/directory2/%s -- you can invoke it
as xx: . with the period to bring up the directory instead
of a specific file, xx: .. to go back one additional directory,
probably more useful on your local site than on most websites.
problem: since slashes cannot customize a search for — g: site:mozilla.org inurl:support inurl:firefox %s
JavaScript
javascript:open("http://mail.google.com/","menubar=yes,toolbar=no,location=yes,directories=yes,status=yes,resizable=yes,scrollbars=yes");
Chrome URLs, Jesse Ruderman, to bring up portions of the options menu — i.e. chrome://browser/content/pref/pref.xul
See Keyboard shortcuts in HELP. Useful shortcuts include completing a domain name node to enter it as .com use Ctrl+Enter, to enter as .net use Shift+Enter, to enter as .org
use Ctrl+Shift+Enter — you do not want to waste effort
creating keyword shortcuts for such sites that you know so well. Such
sites addressed by a single word do not need keyword shortcuts.
Also see Sorting Bookmarks in Firefox,
and an Extension above to sort permanently in your bookmarks.html
Opening a Bookmarked page into a new tab (#newtab)
Just as you can open any link on a webpage into a new tab(/window) with a keyboard shortcut, you can use the same keyboard shortcuts to open a bookmark in a new tab(/window) after modifying about:config so that they match.You can Alt+Enter to open search from search bar into a new page, or to open a typed in (pasted in) url from the location bar.
Open Bookmarks in New Tab, After you installed this addon to your Firefox, bookmarks are opened in new tab always, and because they share their codes, all items in "History" sidebar panel and "Library" are also opened with new tabs. I'm using other means to open a folder of bookmaerks.
Making a bookmarked page open automatically in a new page with JavaScript
You can bookmark one of these as "gmail:" to open your GMail inbox.I bookmarked both and gave the first one a keyword of "gmail:" opens in Basic HTML and the second one opens in Standard and has a color theme (view=pu) and I gave it a keyword of "gmail2:" through bookmark properties. To invoke the first one simply type gmail: into the location bar.
https://mail.google.com/mail/?ui=html&zy=s
https://mail.google.com/mail/?ui=2&fs=1&view=pu&st=themes#inbox Add Javascript to your bookmarklet so your GMail inbox opens automatically in a new tab/window.
javascript:void(window.open(location.href="https://mail.google.com/mail/?ui=html&zy=s"))
12) Speed up Firefox. If you have a broadband connection (and most of us do), you can use pipelining to speed up your page loads. This allows Firefox to load multiple things on a page at once, instead of one at a time (by default, it’s optimized for dialup connections). Here’s how:
- Type “about:config” into the address bar and hit return. Type “network.http” in the filter field, and change the following settings (double-click on them to change them):
- Set “network.http.pipelining” to “true”
- Set “network.http.proxy.pipelining” to “true”
- Set “network.http.pipelining.maxrequests” to a number like 30. This will allow it to make 30 requests at once.
- Also, right-click anywhere and select New-> Integer. Name it “nglayout.initialpaint.delay” and set its value to “0″. This value is the amount of time the browser waits before it acts on information it receives.
14) Reduce RAM usage further for when Firefox is minimized. This setting will move Firefox to your hard drive when you minimize it, taking up much less memory. And there is no noticeable difference in speed when you restore Firefox, so it’s definitely worth a go. Again, go to about:config, right-click anywhere and select New-> Boolean. Name it “config.trim_on_minimize” and set it to TRUE. You have to restart Firefox for these settings to take effect.
15) Move or remove the close tab button. Do you accidentally click on the close button of Firefox’s tabs? You can move them or remove them, again through about:config. Edit the preference for “browser.tabs.closeButtons”. Here are the meanings of each value:
- 0: Display a close button on the active tab only
- 1:(Default) Display close buttons on all tabs
- 2:Don’t display any close buttons
- 3:Display a single close button at the end of the tab bar (Firefox 1.x behavior)
Share this on your favourite network


